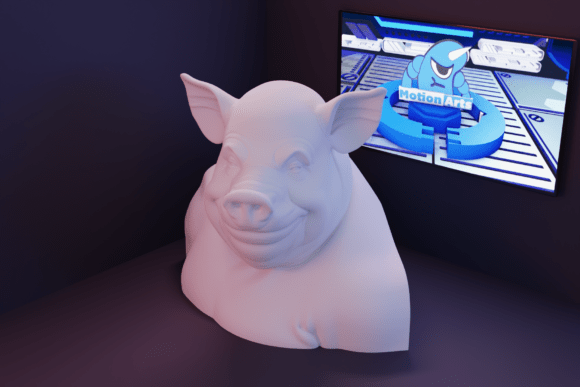
Big Pig Bust: Maximizing Impact in Your 3D Printed Collection
There is a distinct satisfaction in holding a physical object that commands attention. Whether you are curating a shelf of fantasy miniatures, designing thematic decor for a gaming table, or simply exploring the expressive potential of additive manufacturing, scale and presence matter. The Big Pig Bust offers a compelling solution for creators seeking to add weight and character to their displays. This STL model captures the robust features and grandeur of its subject, translating digital design into a tangible statement piece. However, moving from a digital file to a successful print requires more than just clicking "print." Many enthusiasts overlook critical preparation steps, leading to wasted filament, failed prints, or finishes that do not do justice to the design.
Understanding the Appeal of Bold Sculptural Forms
The interest in pieces like the Big Pig Bust stems from a desire for uniqueness. In a market saturated with generic humanoids or standard geometric shapes, organic, creature-based sculptures offer a refreshing alternative. These models serve multiple purposes. For tabletop gamers, they can act as imposing boss monsters or unique NPCs. For interior designers, they provide a conversation-starting accent that blends whimsy with artistic strength. For 3D printing hobbyists, they represent a technical challenge that rewards careful slicer configuration.
The primary advantage of this specific STL file is its focus on structural integrity and visual impact. The design emphasizes broad planes and defined features, which are ideal for showcasing layer adhesion and paint application. Yet, the very features that make the bust striking—its size and complex contours—can trip up inexperienced users who assume all STL files are created equal.
Common Pitfalls in Printing Large-Scale Busts
One of the most frequent mistakes beginners make is underestimating the importance of orientation. When downloading a model like the Big Pig Bust, it is tempting to load it into your slicer and print it exactly as it appears in the preview. This often leads to poor surface quality on visible areas or excessive support usage that damages delicate details upon removal. Another common oversight is ignoring the limitations of one’s specific hardware. A model designed for high-resolution resin printers may look vastly different when printed on a fused deposition modeling (FDM) machine without adjusted settings.
Furthermore, many users fail to account for the physical stresses involved in printing large, solid objects. Without proper infill density or wall thickness adjustments, a heavy bust can warp during cooling or crack under its own weight if handled improperly. These issues are not defects in the design but rather mismatches between the user’s process and the model’s requirements.
The Trap of Ignoring Support Structures
Support structures are necessary evils in 3D printing, but how you generate them defines the final quality. A frequent error is using automatic support generation without manual refinement. For a bust with prominent facial features or protruding elements, generic supports can leave scars that are difficult to sand away. This affects the aesthetic value and increases post-processing time significantly.
Better Approach: Take time to manually place supports. Focus on overhangs greater than 45 degrees and ensure supports touch the model at sturdy points rather than delicate edges. Using tree supports can often reduce contact points and make removal cleaner, preserving the intricate details of the pig’s snout or ears.
Misjudging Material Properties
Not all filaments or resins behave the same way. PLA is popular for its ease of use, but it can be brittle. If your Big Pig Bust is intended for a high-traffic area or frequent handling, PLA might snap if dropped. Conversely, PETG offers flexibility and strength but can string heavily if retraction settings are not optimized, leading to a messy finish that requires extensive cleanup.
Practical Advice: Consider the end-use of your print. For display-only pieces, PLA works well. For durable props or items that will be moved often, consider PETG or ASA. Always review the manufacturer’s recommended temperature and cooling settings for your chosen material to avoid warping.
Evaluating the Digital File Before Printing
Before committing hours of printer time, it is crucial to inspect the STL file. Since this is an AI-generated 3D design, it may contain artifacts or non-manifold geometry that standard slicers struggle to interpret. Non-manifold edges can cause slicing errors, resulting in holes or missing layers in the final print.
Use mesh repair tools available in most modern slicers or dedicated software like Meshmixer or Blender to check for errors. Look for inverted normals or intersecting meshes. Fixing these issues digitally ensures a smoother printing process and reduces the risk of mid-print failures. Additionally, verify the scale. AI-generated models sometimes lack real-world scaling references. Measure the dimensions in your slicer to ensure the bust fits your intended space and printer bed.
Optimizing Slicer Settings for Quality and Efficiency
Achieving a professional look requires balancing print speed with quality. Rushing the process often leads to visible layer lines and reduced detail fidelity. For a detailed bust, slower print speeds allow for better extrusion control and cooling. Increase the number of perimeter walls to enhance structural strength and provide a smoother outer surface. A higher infill percentage is not always necessary for decorative pieces; a gyroscopic or cubic infill pattern at 15-20% often provides sufficient stability while saving material.
Layer height is another critical variable. While 0.2mm is standard, dropping to 0.12mm or 0.16mm can significantly improve the smoothness of curved surfaces, such as the cheeks and forehead of the bust. This reduction in layer visibility minimizes post-processing effort, allowing you to spend less time sanding and more time painting.
Post-Processing: Bringing the Character to Life
The print is only half the journey. Proper post-processing transforms a plastic object into a collectible piece. Start by carefully removing supports. Use flush cutters to snip supports close to the model, then sand the remaining nubs with progressively finer grit sandpaper. For FDM prints, consider using a filler primer to hide layer lines before painting.
Painting offers the greatest opportunity for personalization. A base coat of neutral gray helps identify missed spots. From there, you can choose realistic porcine tones or fantastical colors to match your theme. Dry brushing highlights the robust features captured in the STL, emphasizing the muscle structure and facial expressions. Sealing the final piece with a matte or gloss varnish protects the paint and adds a professional finish.
Making an Informed Decision
When considering adding the Big Pig Bust to your library, ask yourself if your current setup can handle the print volume and complexity. Review your printer’s build plate size and ensure you have adequate ventilation if using resin. Check recent reviews or community forums for tips specific to this model, as other users may have shared optimal orientation strategies.
Remember that this is a digital product. Actual results depend on your equipment, materials, and skill level. By approaching the print with patience, attention to detail, and a willingness to adjust settings, you can avoid common pitfalls and achieve a result that truly adds strength and presence to your collection. The goal is not just to print a model, but to create a piece that reflects your craftsmanship and enhances your creative environment.
Ultimately, the value of the Big Pig Bust lies in its versatility and bold design. Whether you are a seasoned professional looking for a quick yet impressive project or a beginner eager to tackle a larger scale print, this model offers a rewarding experience. By respecting the technical requirements and investing time in preparation and finishing, you ensure that the final product meets your expectations and stands out in your display.