RPG Guardian: A Practical Guide to 3D Printing Your Fantasy Defender
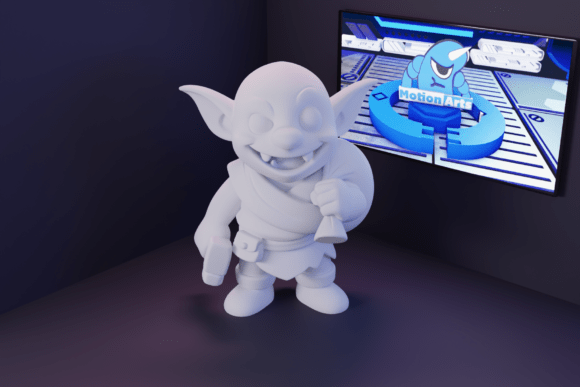
The allure of tabletop gaming extends far beyond the dice and character sheets. For many enthusiasts, the tactile experience of holding a miniature that represents their hero or nemesis adds a profound layer of immersion to the hobby. Enter the RPG Guardian, a 3D STL file designed to embody the quintessential protector of magical realms. With its imposing silhouette and heroic detailing, this model serves as more than just a game piece; it is a statement of strength and loyalty, perfect for dioramas, themed decor, or as a centerpiece for your collection.
However, transitioning from a digital file to a physical object is not always straightforward. Many creators, whether they are seasoned veterans or complete beginners, encounter avoidable pitfalls when downloading and printing fantasy miniatures. Understanding these common missteps can save you time, material, and frustration, ensuring that your final print honors the epic design intended by the creator.
Understanding the Model Before You Slice
The RPG Guardian is marketed as a solid, easy-to-print model, but "easy" is relative in the world of additive manufacturing. One of the most frequent mistakes buyers make is assuming that "print-ready" means "plug-and-play." While the STL file is optimized for general use, every 3D printer has unique quirks. Ignoring the specific geometry of the Guardian’s armor plates and weapon placements can lead to failed prints or poor surface quality.
For instance, the Guardian’s shield and heavy armor create natural overhangs. If you slice the model without carefully considering support structures, you may find sagging details on the underside of the shield or bridging issues across the chest plate. This does not mean the file is flawed; rather, it requires a thoughtful approach to orientation. Rotating the model slightly forward or backward can significantly reduce the amount of support material needed and improve the visibility of key facial features and heraldic details.
Common Mistakes in Material Selection
Another area where enthusiasts often stumble is material choice. It is tempting to use whatever filament is currently loaded in your printer, but the RPG Guardian demands consideration of its intended use. Are you painting it? Will it be handled frequently during gameplay? Or is it strictly for display?
- PLA for Display: If the Guardian is destined for a shelf or diorama, standard PLA is an excellent choice. It captures fine details well and is easy to print. However, PLA can be brittle. If your Guardian has thin spear tips or delicate cloak edges, these may snap if dropped.
- PETG or ABS for Durability: For pieces that will be moved around a gaming table, consider PETG. It offers greater flexibility and resistance to impact. The trade-off is that PETG can sometimes string more than PLA, requiring additional post-processing cleanup.
- Resin for Detail: If you are using an SLA printer, the level of detail achievable is superior. However, resin prints are fragile and require careful washing and curing. Misunderstanding the care requirements of resin can lead to a model that degrades or remains sticky over time.
Choosing the wrong material for your specific use case can result in a model that looks great initially but fails to withstand the rigors of regular use or environmental changes. Always align your material choice with the final application of the miniature.
Overlooking Scale and Proportion
A subtle but critical error involves scale. The RPG Guardian STL file is typically provided at a standard heroic scale, but this may not match the rest of your collection. Beginners often print the model at 100% scale only to discover it towers over their existing party members or looks diminutive next to their boss monsters.
Before committing to a full print, it is wise to print a small test section, such as the base or the head, at different scales. Compare these test prints against your existing miniatures. Adjusting the scale by even 5-10% can make the difference between a model that looks like it belongs in the scene and one that looks out of place. This simple step ensures visual consistency in your dioramas and gaming setups.
The Importance of Post-Processing
Many users underestimate the role of post-processing. A raw print, even from a high-quality STL like the RPG Guardian, rarely looks showroom-ready straight off the build plate. Support marks, layer lines, and minor imperfections are normal. Failing to account for the time and tools needed for cleanup can lead to disappointment.
To achieve a professional look, consider the following steps:
- Careful Support Removal: Use flush cutters to remove supports close to the model, then gently sand the remaining nubs. Rushing this step can gouge the armor details.
- Priming: A good filler primer can help smooth out layer lines and reveal any hidden defects before you commit to paint. This is especially important for large, flat surfaces like the Guardian’s shield.
- Base Coating: Start with a solid base coat to unify the surface. This helps subsequent layers of paint adhere better and appear more vibrant.
By anticipating these steps, you transform a simple plastic print into a cherished piece of art. The effort invested in post-processing directly correlates to the final aesthetic quality and your overall satisfaction with the product.
Evaluating Digital Assets Responsibly
It is also essential to remember that the RPG Guardian is a digital asset, potentially AI-assisted in its design phase. This means that while the geometry is robust, it may lack the intentional artistic nuances of a hand-sculpted piece. Some details might be overly complex or simplified depending on the generation process. Always inspect the model in your slicer software before printing. Look for non-manifold edges, inverted normals, or floating geometry that could cause slicing errors.
If you encounter issues, do not assume the file is broken. Often, simple repairs in mesh editing software or adjusting slicer settings can resolve these problems. Engaging with community forums or the provider’s support channels can also offer valuable insights into best practices for this specific model.
Making the Right Choice for Your Collection
Ultimately, adding the RPG Guardian to your library is about enhancing your creative expression. Whether you are a dungeon master looking for a formidable NPC, a collector filling a shelf with iconic archetypes, or a hobbyist testing your printing skills, this model offers a rewarding challenge. By avoiding common pitfalls in preparation, material selection, and finishing, you ensure that the final result reflects the strength and loyalty the Guardian represents.
Take the time to plan your print. Check your slicer settings, choose the right material, and prepare for post-processing. With these practical steps, you keep the flame of adventure alive in your collection, turning a digital file into a tangible testament to your craftsmanship. ⚔️✨